This tutorial describes the process I used to create the image "This House Is Haunted".
The image was inspired by the highly stylized landscape photographs of Jason Ertel. The first step was to pick out the elements that made up the character of these images. I finally decided it boiled down to three specific characteristics:
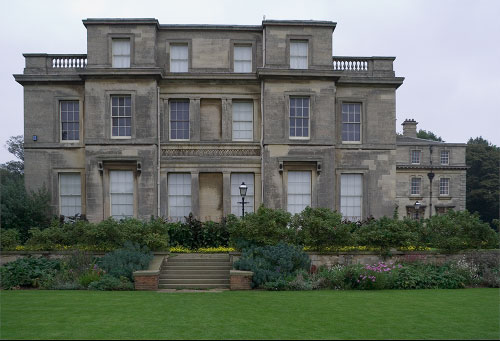
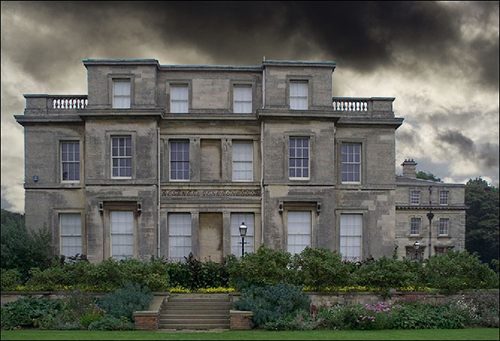
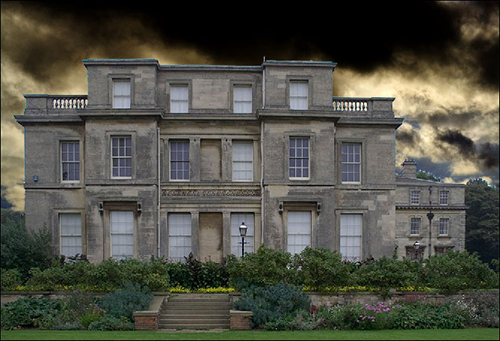
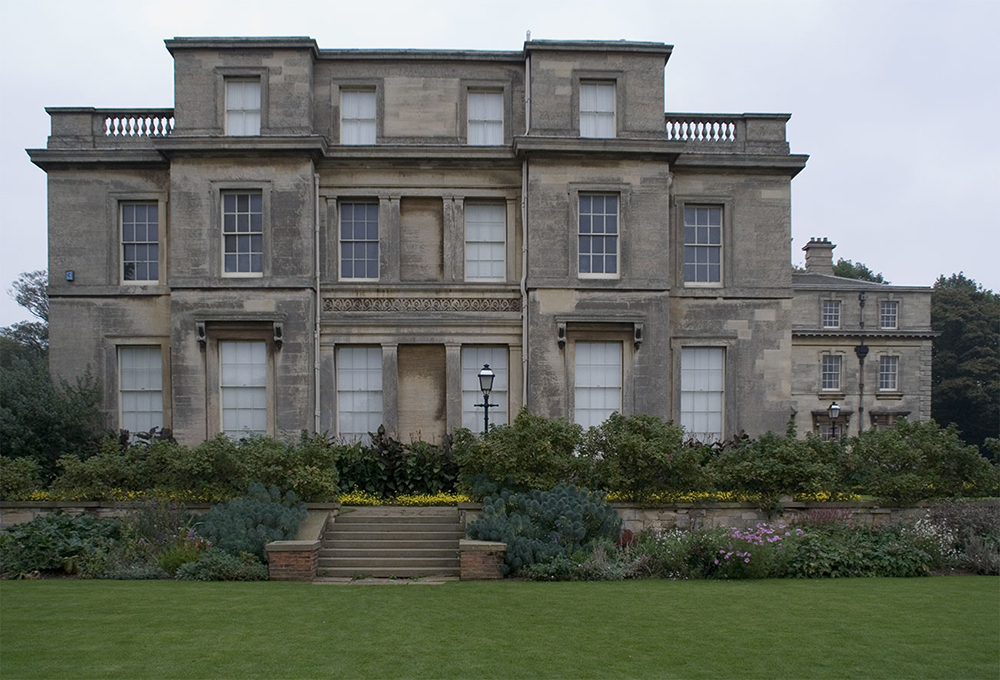
So now we know what effects we want to achieve, lets get to it. Firstly, you'll need the main subject photo - in this case the house that we are going to "haunt". Here's the one I'm going to use:
You can download your own copy to follow along with the tutorial from here.
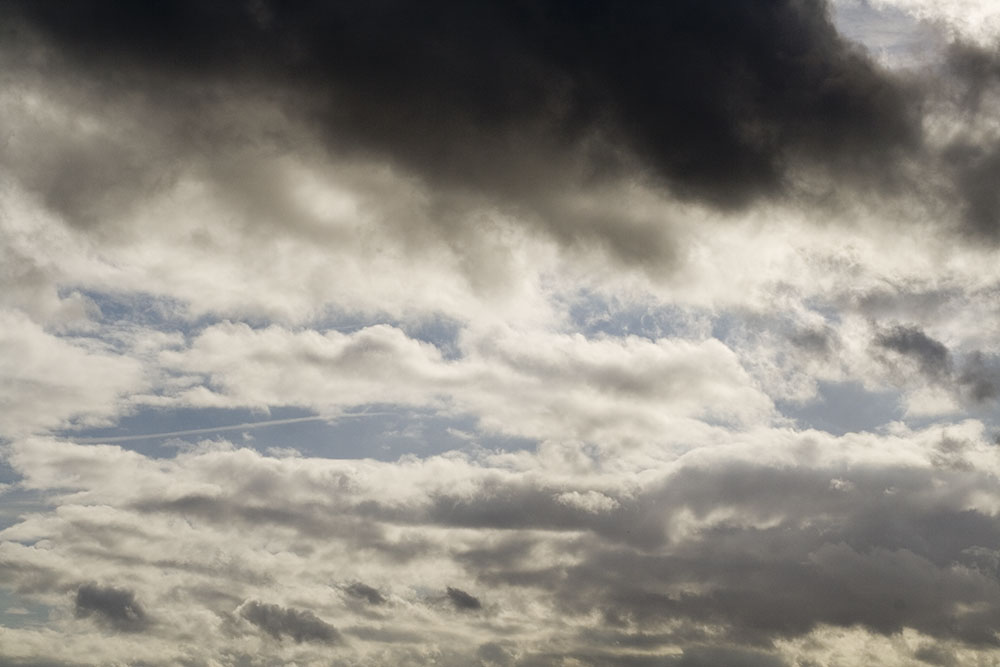
As you can see, the sky in this photo is anything but dramatic, so we'll need a sky image too. Here's mine:
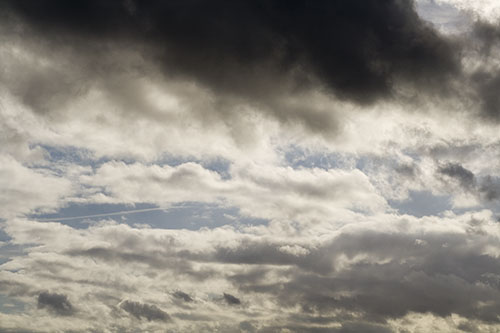
You can download a copy from here.
Due to the wonderful English weather I sometimes find that I have otherwise good photos that are spoiled by a lacklustre sky, so whenever I see a dramatic or colourful sky I always grab a few shots. Over time, I have built up quite a library of good skies that I can use in situations like this.
Step 1: First, we need to remove the original sky from the House image. Open it up in Photoshop, right-click the Background layer in the Layers palette and select Layer From Background... from the pop-up menu. Give the layer a name (let's call it House) and then click OK in the New Layer dialog box.
Step 2: Select the sky area. Which selection tool you use is a matter of personal choice - since the sky in this image is quite uniform, I'm going to use the Magic Wand tool. Set the Tolerance to 32 with Anti-Alias and Contiguous both checked. Click in the sky area. You'll see that most of the sky is selected, although we also need to select the small areas of sky that are visible though the balustrades at the top of the walls. It may help to zoom in a bit so you can see these areas more clearly. Hold down Shift (to add to the current selection) and click each bit of sky. Try lowering the tolerance level if too much wall is getting selected.
Step 3: Once you are happy with your selection, press Delete to remove the sky.
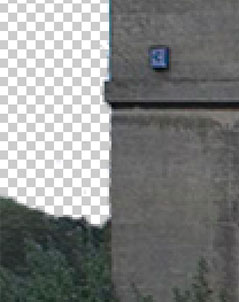
Step 4: You will notice that the trees at the lower left area of the image have unselected areas of sky showing through their branches:
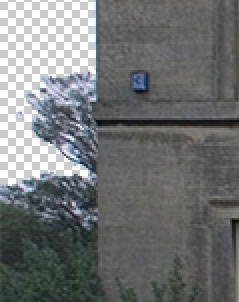
If they had been more prominent parts of the image, I might have taken the trouble to select and remove them too, but I decided to remove the tree branches altogether. Select the Eraser tool and choose a medium-sized, hard-edged brush. Erase the unwanted branches:
Step 5: I wasn't happy with the balance of the composition in the original House image - I thought there was too much lawn at the bottom of the image, and it needed more space above the house to show off the dramatic sky.
First, I checked the image size (Image > Image Size...) and noted it was 1000px x 680px. I decided I would shave off 80px from the bottom of the image, so I selected the Crop tool and entered the following values in the option bar:
![]()
Click outside the top left corner of the image and drag the Crop tool's cursor downwards and to the right until the crop area extends across the entire image. Press Enter to crop the image.
Now add an extra 80px of space to the top of the image. Select Image > Canvas Size... and set the following options:
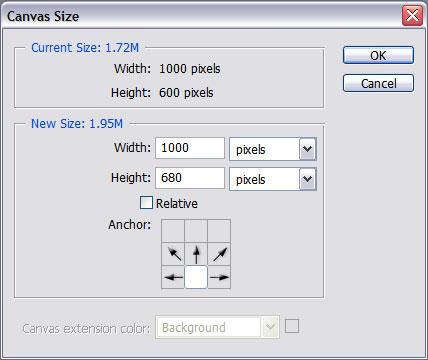
Click OK to finish.
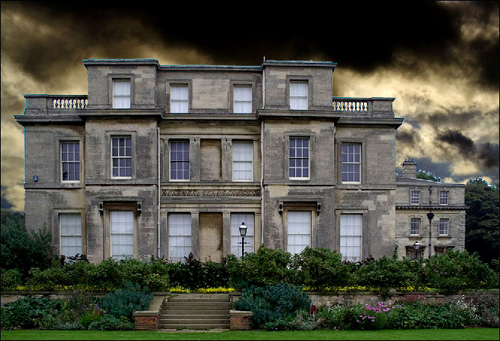
Step 6: Now to bring in the sky. Open up the sky image and select the Move tool. Click and drag the sky image into the house image. When you release the mouse button, the sky image will appear as a new layer. Name this layer Sky and then drag it to the bottom of the layer stack in the Layers palette. With the Sky layer active, use the Move tool and/or the arrow keys to position the sky correctly. Now your Layers palette should look like this:
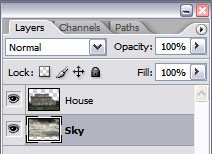
and your working image will look something like this:
Already a big improvement, but there's more to come.
Step 7: Now we're going to work on the sky. Make sure the Sky layer is still active, then add a Hue/Saturation adjustment layer (Click the Create new fill or adjustment layer icon at the bottom of the Layers palette and then select Hue/Saturation..., or select Layer > New Adjustment Layer > Hue/Saturation... from the menu). In the Saturation textbox, enter a value of +35 and click OK.
Now add a Levels adjustment layer above the Hue/Saturation layer. Play around with the sliders until you get a really dramatic-looking sky. The settings I ended up with were:
and here's the image:
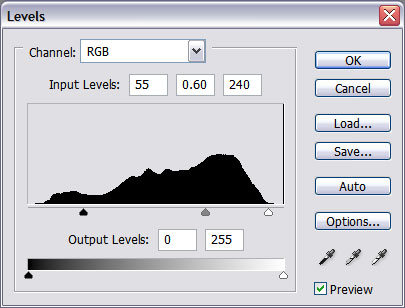
Step 8: Now it's time to work on the house. Click the House layer to make it active, then add a Levels adjustment layer above it. Don't make any changes just yet - click OK to close the Levels dialog box. We don't want this Levels adjustment layer to affect the Sky layer, so we need to clip it to the House layer. Hold the Alt key down and hover your mouse over the join between the House layer and the Levels adjustment layer above it - the cursor should change to two overlapping circles. Click to create the Clipping Mask. Now we can double-click the Levels adjustment layer icon to open the Levels dialog box. Once again, play around with the sliders to really beef up the contrast of the House image. These are the settings I used:
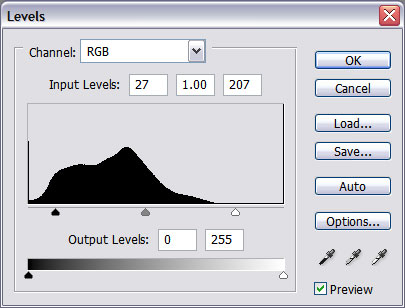
and here's the image:
Now for the extreme sharpening. I originally thought this was the result of using a filter such as Unsharp Mask or Smart Sharpen, but I found the following method gave a much better effect:
Step 9: Click the House layer to make it active, then make a copy of it (either by dragging it to the Create a new layer icon at the bottom of the Layers palette, or by right-clicking the layer and selecting Duplicate Layer...). Name this layer Hard Mix and drag it to the top of the layer stack.
Step 10: With the Hard Mix layer active, change the Blending Mode to Hard Mix. Invert the layer (select Image > Adjustments > Invert or click Ctrl+I). Apply a small amount of Gaussian Blur (Filter > Blur > Gaussian Blur... and set the Radius to about 5 pixels). Change the layer Fill to 70%.
Step 11: To further refine the sharpening effect, duplicate the House layer again, as described in Step 9 above. Drag this duplicate to the top of the layer stack and name it Pin Light.
Step 12: With the Pin Light layer active, change the Blending Mode to Pin Light . Invert the layer . Apply a small amount of Gaussian Blur (again, set the Radius to about 5 pixels). Change the layer Fill to 20%.
(If the House layer has become unclipped from the layers above it during the duplication processes, re-clip it to the Levels adjustment layer as described in Step 8 above.)
Here's the image now:
Step 13: To consolidate the final image and to restore some black to the shadows in the House layer, add one more Levels adjustment layer to the top of the layer stack. This is not a clipping mask, so it will affect the entire image. The settings I used were:
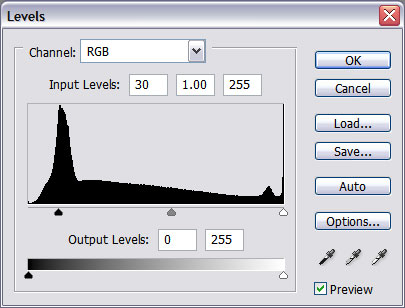
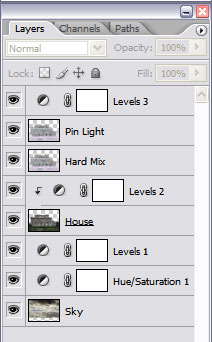
Your final Layers palette should look something like this:
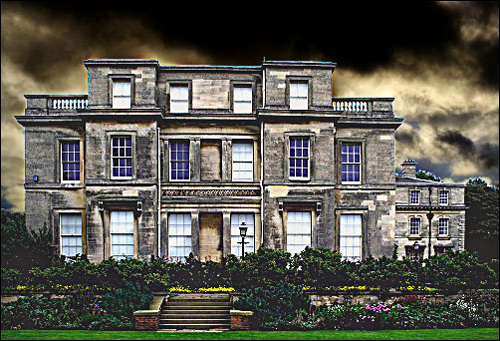
And here's the final image:
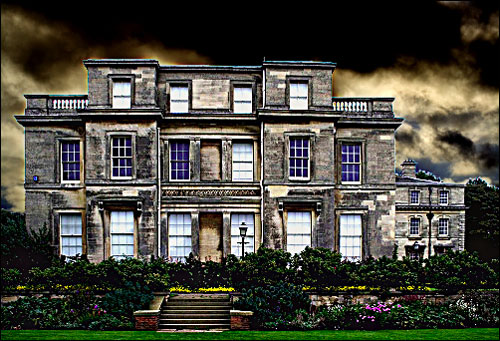
Note that the technique appears a little unsubtle in the above images due to the effects of resizing and optimizing the images for posting to the web. With a larger and higher resolution image, the effect will be better. Also remember that, as with most Photoshop tutorials, none of the above values are absolutes - don't be afraid to play around with the adjustment layers, the amount of Gaussian blur and the layers' Fill values to get the effect exactly to your taste. In Photoshop, experimentation is the key to success.